please read on...
I have been a bad, bad blogger, i know. But i have been sooooooo busy. Busy moving house, travelling, getting hitched, hosting the in-laws, getting food poisoning, overload of work (happily). But I'm back and taking this moment to say hello.
Recently we moved house. From a sprawling old double front californian bungalow with a big back yard and ample front into a tiny terrace. It has been challenging! especially considering that up until now we have had friends staying and i have had no studio or storage!! lucky i was too busy to make art.
But now the space is finally our own - and i am in the process of setting up my studio and in good time too as this month and the next i have a couple of commissions on and desperately need the space!
One of the first challenges of moving into such a small space was the realisation that our courtyard out the back doesn't receive much sunlight. i have never lived in a north facing space before. so it is our front porch that receives day long sun (lookout summer) and our backyard that receives next to none.
Gone were our dreams of a thriving vege patch and self sufficiency! oh woe. But i am the eternal optimist (or so i keep telling myself) and i began to research urban gardening. The possibilities are endless!!!!
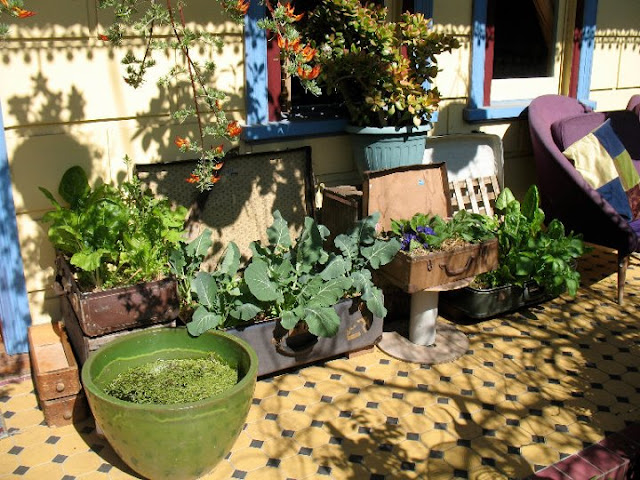
My friend gave me some beautiful old suitcases, and i already had a couple and so i decided to convert them into garden beds for our front porch. (this same friend plants his plants in old stack hats and shoes!)
This is how i did it (i did take progress shots but accidentally deleted them!)
1. the sturdier the suitcase the better. vinyl and plastic is ace. i had old compressed cardboard suitcases so it was a bit tricky. if you want the suitcases to last longer, don't put them out where the weather can get to them.
2. once you have your suitcases punch some holes through the bottom of them. make sure that you push the holes out and underneath so that any water will be forced through it. Maybe just a couple of holes, depending on the size of the suitcase.
3. Line the suitcases with plastic, poke it through the holes and tape it down (under the suitcase). Since the suitcases are basically compressed cardboard i wanted to be sure the water doesn't touch them. I only had garbage bags on hand so i cut them apart and taped them together to make sheets. obviously garden plastic would be best but i'm big on using what i have at hand and especially recycling. and old garbage bags is what i had on hand. make sure you tape the plastic at the top around the rim of the suitcases. i have had trouble here as the tape gets wet when i water the plants. in retrospect i would maybe use a staple gun or something.
4. Secure some mosquito mesh over the holes (on the inside of the suitcase) so water will drain through but you won't lose the soil. I had been creating this soil for over a year and brought it from the old joint to the new. it's beautiful, beautiful soil.
5. Raise the suitcases on bricks so that the bottom won't biodegrade and shezam! your urban vege patch is ready to go. have fun and send me pics please!
We planted cauliflower, rainbow chard, lettuce, rocket, spinach, silverbeet, basil and broccoli. From the compost in the soil has grown potatoes. They are soooo happy and it fills me with delight each night when i go outside to collect my dinner.
Now that we're into Spring here I am looking forward to planting some more yummy things like tomatoes and finding other ingenious ways to urban garden. i'm quite interested in window farming...
I'd love to hear about your gardens?


No comments:
Post a Comment